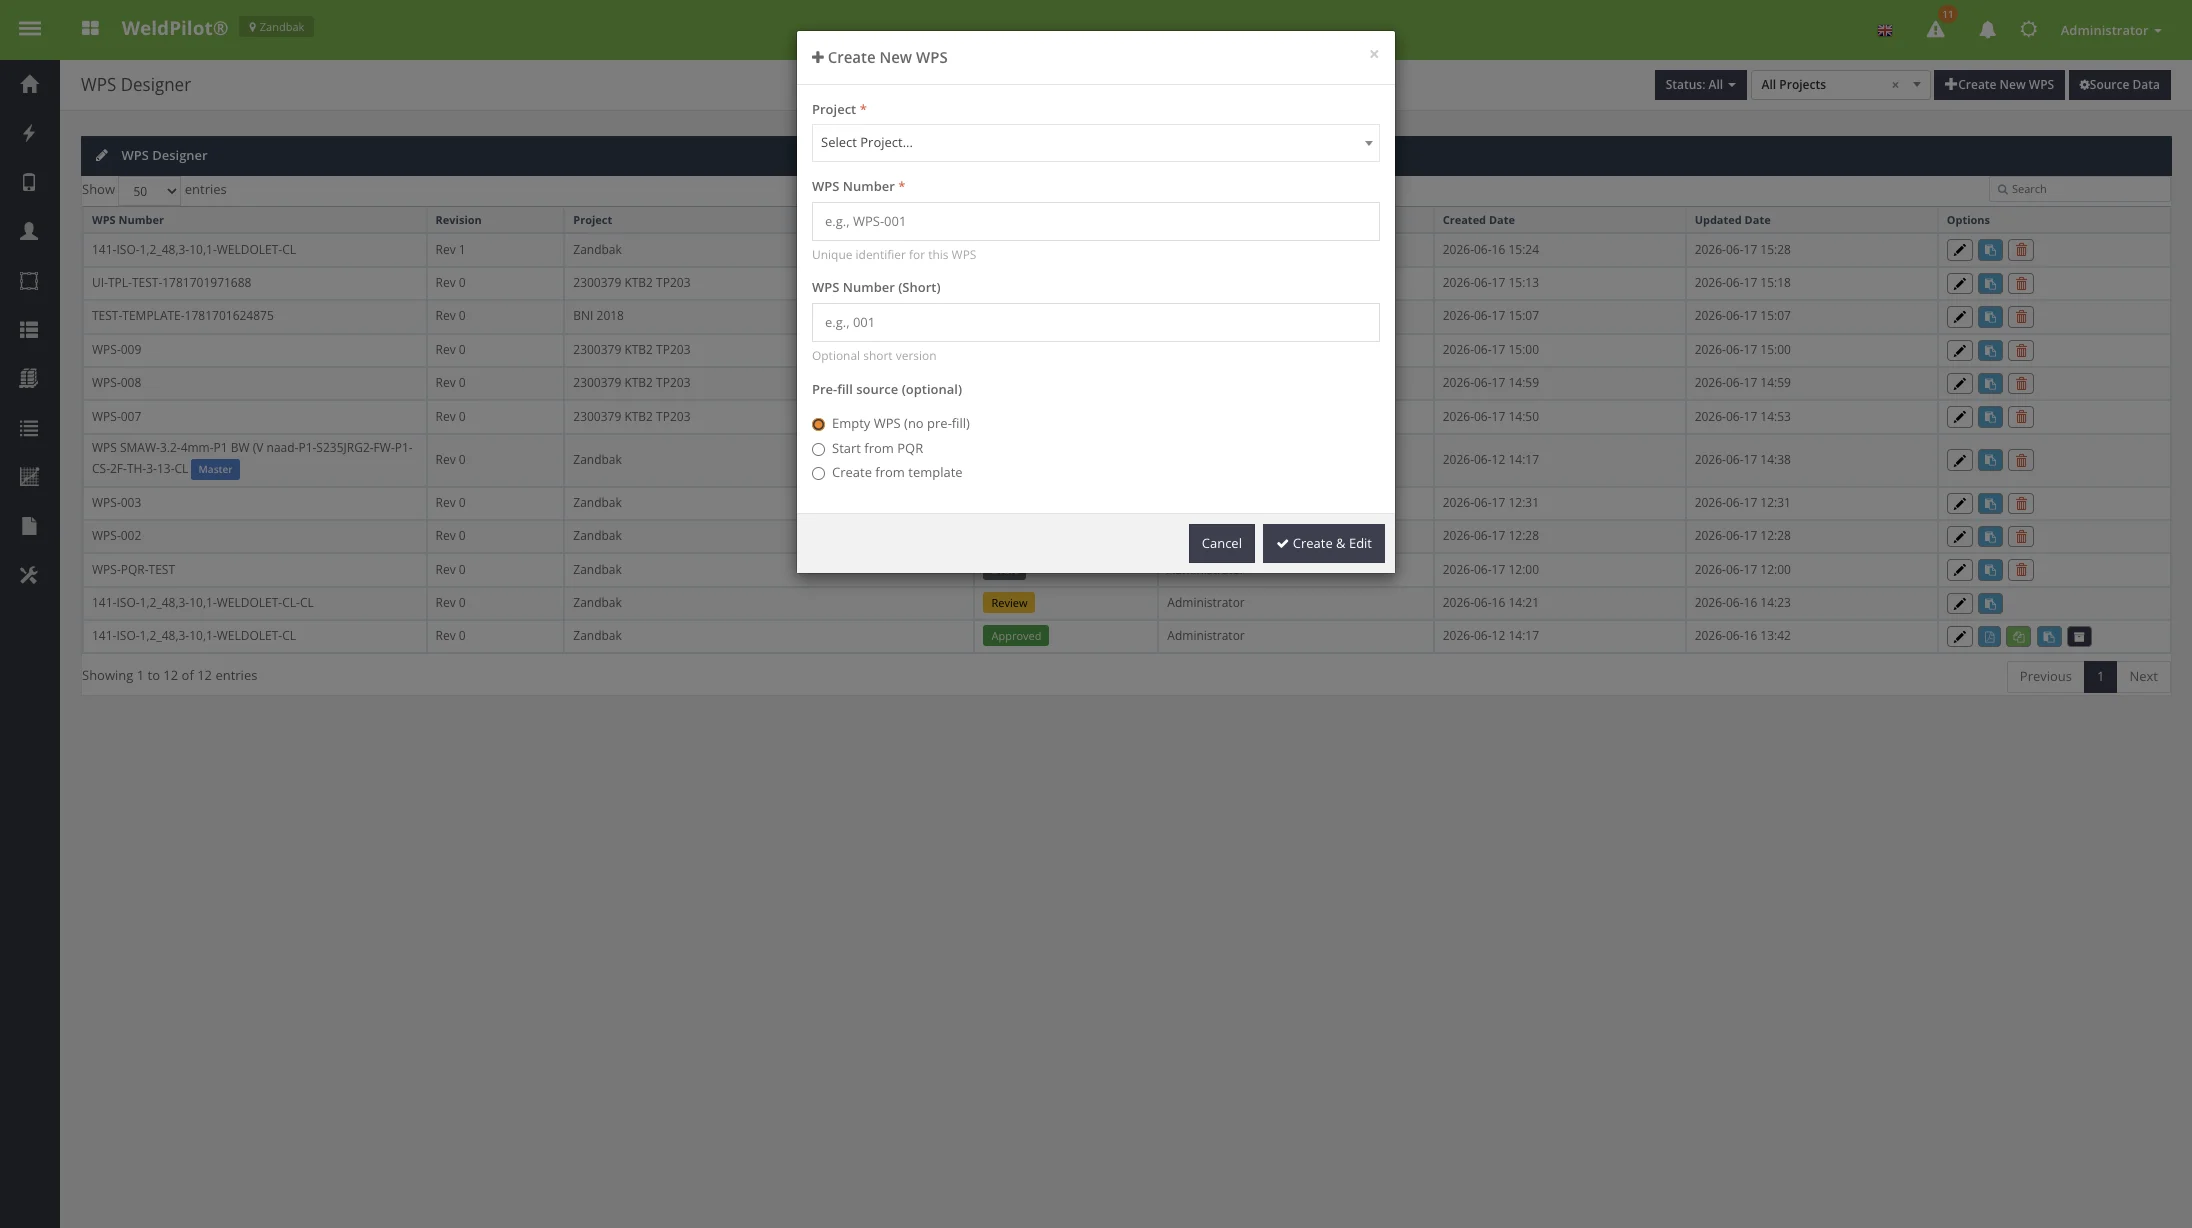
Purpose: Start a new WPS specification. When to use: No suitable template or existing WPS to copy. Related workflows: Empty WPS, pre-fill from PQR, pre-fill from template.
Screenshot
Create New WPS modal
Field Reference
Field
Description
Required
Project
Target project site
Yes
WPS Number
Full WPS identifier
Yes
WPS Number (Short)
Abbreviated reference
No
Pre-fill source
Empty / PQR / Template
No
Action Buttons
Button
Description
Cancel
Close without creating
Create WPS
Validate and open new draft in editor
User Instructions
Click + Create New WPS.
Select Project and enter WPS Number.
Optionally choose a pre-fill source (see §4.2 and §4.3).
Click Create WPS.
Complete the editor tabs and save.
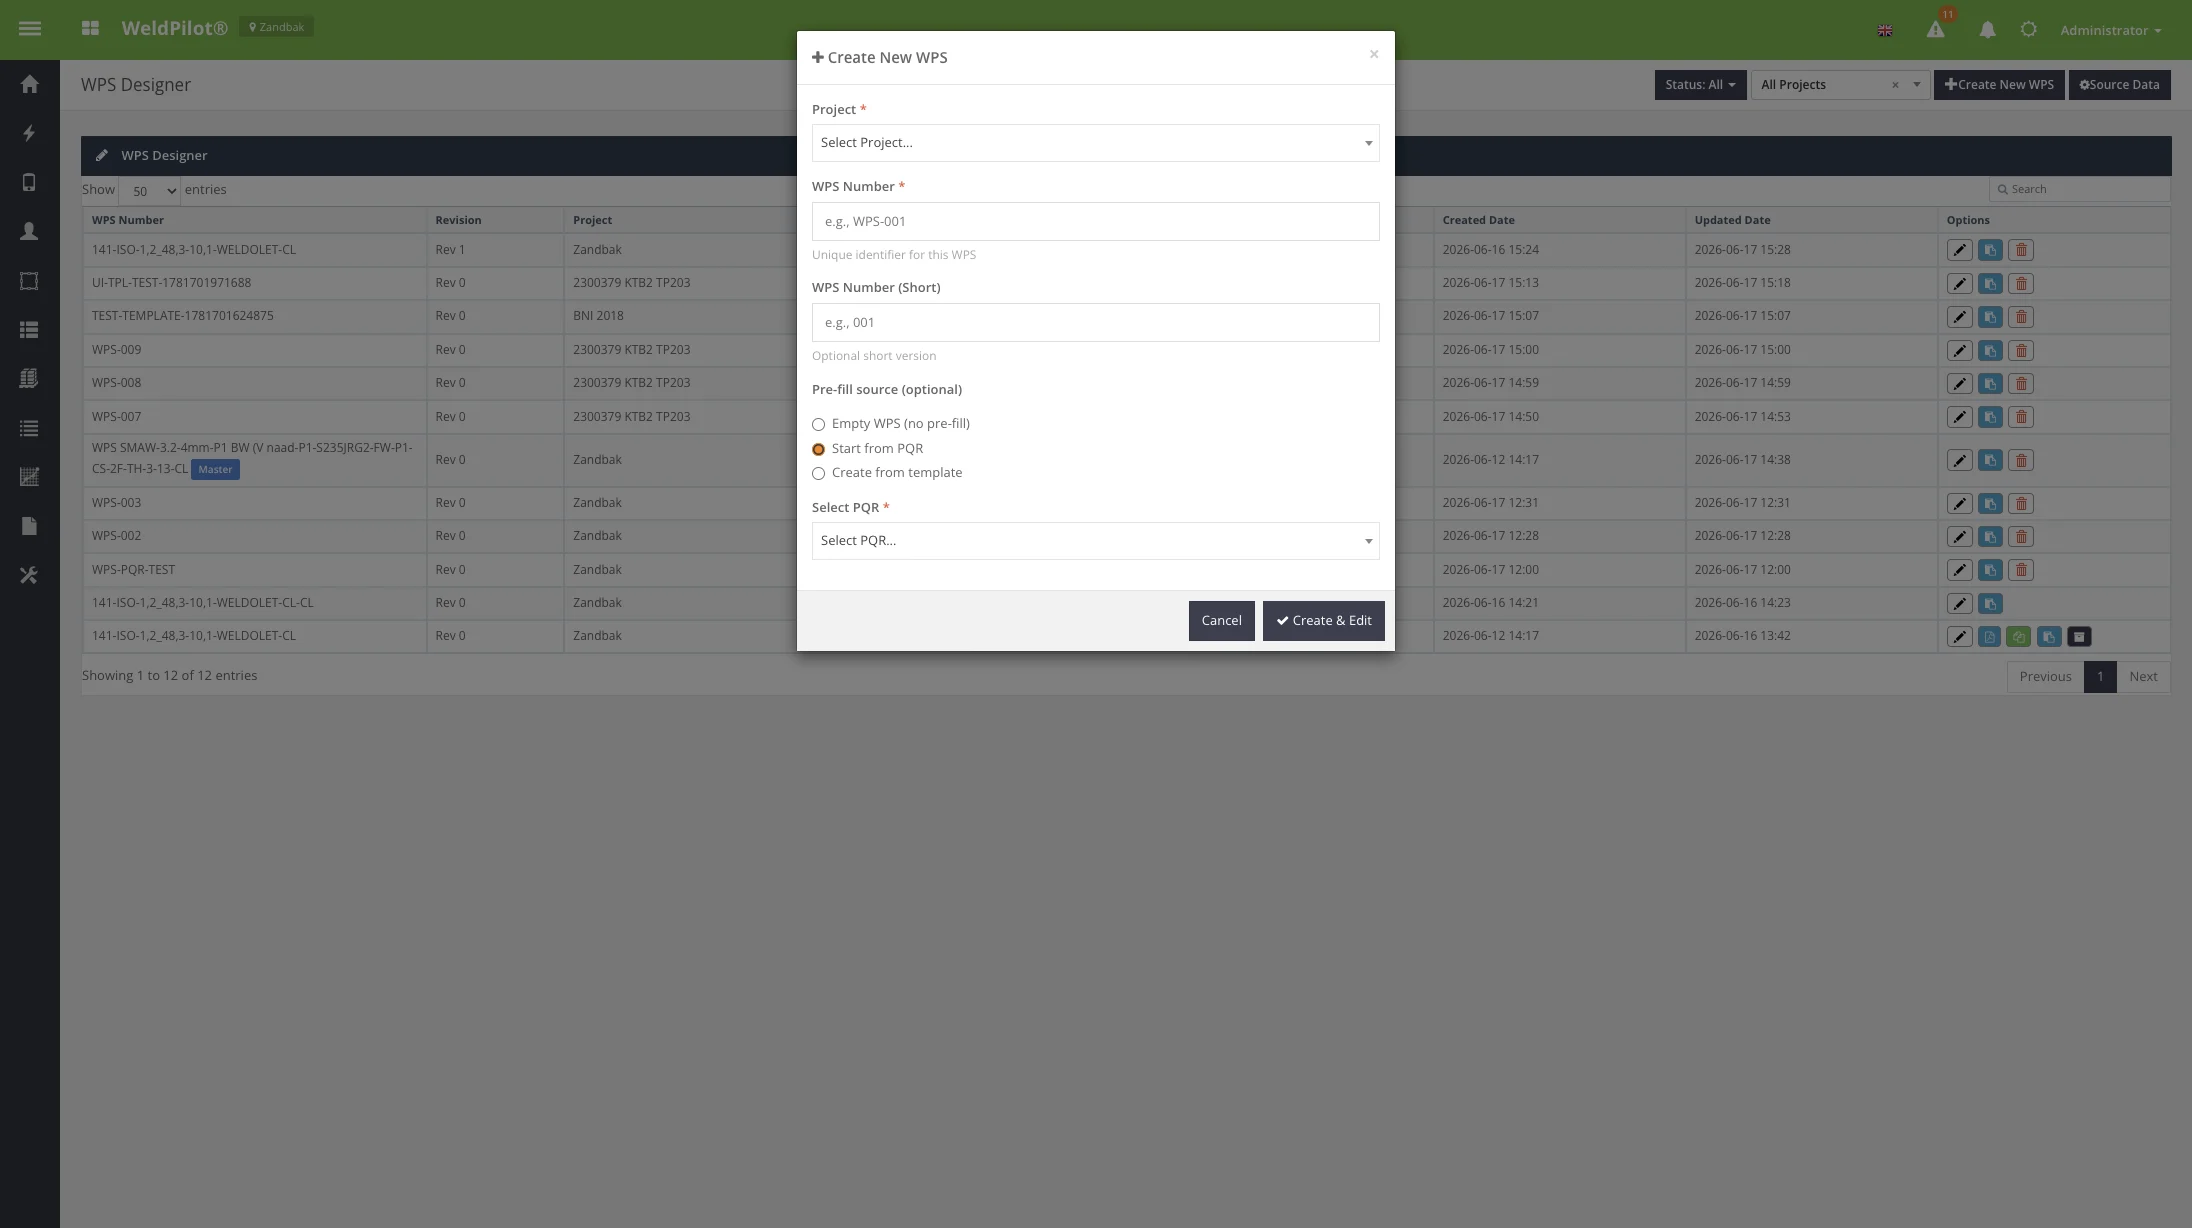
4.2 Create from PQR
Screenshot
Create WPS from PQR
Field Reference
Field
Description
Required
Select PQR
PQR record to copy values from
Yes (when PQR selected)
User Instructions
In the create modal, select Start from PQR.
Choose the PQR from the dropdown.
Click Create WPS.
Review pre-filled values on all editor tabs; adjust where needed.
4.3 Create from Template
Screenshot
Create WPS from template
Field Reference
Field
Description
Required
Select template
Saved WPS template
Yes (when template selected)
Templates are created from the editor via Actions → Save as Template.
4.4 Use for Project (Master Template → Project Copy)
Screen Overview
Purpose: Create a draft project copy from an approved master template WPS. The copy follows its own review/approve cycle for the target project, including customer signatures if configured. When to use: A company-standard WPS (master) must be deployed to a specific project. Prerequisite: Source WPS must be Approved, flagged as Master template, and user needs Insert right.
How to open
On the WPS list, locate a row with the blue Master badge and Approved status.
In Options, click the blue Use for project button (share icon).
Modal fields
Field
Description
Required
Doelproject (Target project)
Project that receives the copy
Yes
WPS Number voor de kopie
WPS number for the copy; leave empty for auto-number
No
PQR-koppelingen meenemen
Copy linked PQR documents to the project copy
No (checked by default)
Action Buttons
Button
Description
Cancel
Close without copying
Projectkopie maken
Create draft copy and open editor
User Instructions
Identify the approved Master WPS on the list.
Click Use for project.
Select the target project.
Optionally set a WPS number or leave blank for automatic assignment.
Confirm whether PQR links should be copied.
Click Projectkopie maken.
Complete project-specific fields, run review/approve for that project.
Master templates remain unchanged. Each project copy is an independent draft WPS.
4.5 Delete WPS Confirmation
Screen Overview
Purpose: Confirm permanent deletion of a draft WPS. When to use: Remove an erroneous or obsolete draft. Restriction: Only Draft status; approved/review WPS cannot be deleted.